
Rigid jewelry box glue bond testing is a disciplined way to decide whether a wrapped box sample is ready to approve—not a search for one impressive pull result. Review each bond by its construction and use, document materials and conditions, distinguish lift from paper failure, and use qualified comparative testing when a peel result will influence an approval decision.
A premium rigid box can look flawless at first glance yet reveal a weak point at a turn-in, corner, or case joint when it is opened, handled, or packed. For jewelry brands, that risk is both functional and visual: a local lift can expose board, create a loose edge, or make a carefully finished box look unfinished.
ON THE WAY develops custom packaging for jewelry brands, including Jewelry Boxes. This article gives buyers a practical way to specify glue-bond review before approving a rigid-box sample or managing a material change.
What glue bond testing means for a rigid jewelry box
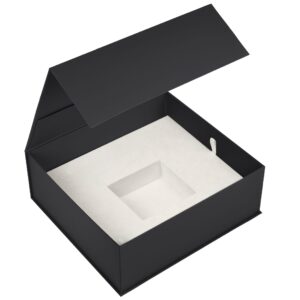
A rigid jewelry box is a built object, not one flat bonded panel. Its wrapped faces, folded turn-ins, corners, and structural board joints place adhesive interfaces in different geometries. Treating all of them as interchangeable can conceal the exact area most likely to disappoint in the finished pack.
Glue bond testing covers two related activities:
- Developmental examination of a completed box: visual inspection, careful handling, opening and closing, and observation of local lifting, wrinkling, squeeze-out, exposed board, or tearing.
- Comparative laboratory testing of a representative bonded construction when the buyer needs controlled evidence to compare material, finish, adhesive, or process options.
Both are valuable, but they answer different questions. A hand pull on a finished box can reveal a concern or help compare samples informally. It is not, by itself, evidence of ASTM compliance.
ASTM D903 concerns comparative peel or stripping characteristics of adhesive bonds using standard-sized specimens and defined pretreatment, temperature, and testing-machine conditions. ASTM also describes the method as requiring suitable powered equipment or specified alternative apparatus and conditioning facilities. ASTM D903 is therefore useful when the construction can be represented by an appropriate specimen and the parties need a controlled comparison—not as a label to attach to any manual check of a finished box.
Define the failure before judging it
Clear approval notes separate what failed from why it may have failed. These terms make supplier, buyer, and laboratory discussions more useful.
Adhesive interface failure
An adhesive interface failure occurs when separation runs between the adhesive and one of the materials it was intended to join. In a wrapped box, that may appear as wrap paper lifting cleanly away from the greyboard, or a structural joint opening along its glued contact area.
It can point to a mismatch among surface, adhesive, application, pressure, assembly timing, or cure/dry conditions. It does not automatically establish the root cause. A buyer should preserve the sample, photograph the location, and compare it with the approved construction before requesting a correction.
Cohesive failure within the adhesive
Cohesive failure occurs within the adhesive layer itself: adhesive remains on both sides after separation. It is different from an interface failure because the bond to each surface may have remained more intact than the adhesive’s internal body.
For approval, record it as a failure mode rather than treating it as inherently acceptable or unacceptable. Its meaning depends on whether the joint remains secure and whether it occurred in a representative construction under relevant conditions.
Paper fiber tear
Paper fiber tear occurs when fibers from the paper surface remain with the adhesive or substrate after separation. It often suggests that the local adhesion exceeded the surface layer’s resistance at that moment.
But fiber tear alone is not universal proof of good adhesion. Paper strength differs by grade, coating, grain direction, moisture history, lamination, and sample condition. A weak or unusually conditioned paper can tear before an adhesive interface is meaningfully challenged. Conversely, a sound bond may not produce fiber tear on every finish. The approval record should state the substrate, failure appearance, and test conditions rather than relying on the phrase “fiber tear” as a pass decision.
Paperboard ply delamination
Paperboard ply delamination is separation within the board’s own layers. It is not the same as paper fiber tear in the wrap, and it is not necessarily proof that the wrap-to-board interface is the issue. On a rigid-box shell, it may be particularly relevant when a test or handling event damages the board substrate before the intended adhesive interface separates.
The practical distinction matters: the corrective path for a local wrap lift is unlikely to be identical to the path for board-layer separation.
Separate the four joint families
A useful approval plan names each joint family and assigns an appropriate observation. Do not make a peel coupon the proxy for every part of a box.
Wrapped faces
Inspect broad faces for bubbles, voids, read-through, distortion, and lifting under the lighting and viewing distance agreed for cosmetic approval. Dark or reflective wraps can make small irregularities conspicuous.
A flat, representative laminate or wrap-to-board coupon may be appropriate for controlled comparative peel work. Keep its construction traceable to the actual box: the same wrap, board, finish, adhesive route, and relevant process window should be identified.
Turn-ins
Turn-ins are the folded wrap edges carried into the box interior. They combine bend stress, edge geometry, and cosmetics. Inspect whether the edge lies flat, whether the wrap is securely seated, and whether glue squeeze-out changes the interior appearance or product-contact area.
A turn-in is not automatically a peel-test coupon. Its folded geometry may be better evaluated through assembled-case inspection plus a specifically designed representative construction when an investigation requires it.
Corner joints
Corners concentrate folding, trimming, alignment, and layered material. A corner may look neat while hiding a small edge lift that later catches during handling. Review each corner as a visual and tactile feature: look for opening seams, lifted tips, exposed board, bunching, and inconsistent overlap.
Structural joints
Structural joints hold board components together: for example, the case or tray construction that gives a rigid box its shape. Their task differs from the decorative wrap. Look for joint opening, distortion, loss of squareness, or movement that changes opening feel and product fit.
Because a structural joint may not have a flexible layer intended for a conventional peel geometry, it is often inappropriate to force it into a peel result. Define an assembled-case observation or a purpose-designed engineering evaluation instead.
When comparative peel testing adds value
A peel test applies tensile force to a flexible bonded material to separate it from a flexible or rigid substrate. Results may be expressed as force and, for a specimen of known width, force per width; the geometry determines what is being compared. The Adhesives Research overview explains D903 as a 180-degree flexible-material separation from a rigid or flexible substrate and describes its use for comparing bonded material systems. Adhesives Research’s ASTM D903 guide supports this limited framing.
For buyers, the value is comparability. A qualified lab can help decide whether a flat representative coupon is suitable and how to document it. If results will decide between sample options or trigger a production hold, request a report that identifies:
- specimen construction, including the specific board, wrap, finish, and adhesive lots;
- peel geometry and angle;
- specimen width and reported result basis, such as force or force per width;
- machine and test speed;
- conditioning and pretreatment;
- the approved reference sample or baseline used for comparison; and
- failure mode, including interface failure, cohesive failure, fiber tear, or board ply delamination.
Do not prescribe a generic threshold into an RFQ without a product-specific basis. A result from one construction, geometry, and conditioned state is not automatically transferable to another wrap, board, or box shape.
A 180-degree peel folds a flexible layer back over itself during separation. A 90-degree configuration keeps the flexible layer at a right-angle peel relationship to a secured rigid substrate. The two geometries load the assembly differently, so they should not be treated as interchangeable values. Choose the geometry only after the lab and technical stakeholders agree it represents the material pair and decision being made.
T-peel is likewise a different arrangement for two flexible bonded materials. It may be meaningful for a flexible-flexible assembly, but it is not a default substitute for a paper wrap bonded to rigid board.
A numbered sample-approval workflow
- Freeze the material identity for the sample. Record the board, wrap paper or fabric, surface finish, adhesive, and relevant lot identities. Name the box construction and affected joint family. “Black paper box” is not enough to recreate an approval basis.
- State the intended cure or dry window. Use the adhesive supplier’s intended window for the selected system. Record when the sample is observed relative to assembly. Do not infer cure from appearance alone or substitute a generic waiting period.
- Inspect the assembled case first. Before pulling at anything, review wrapped faces, turn-ins, corners, and structural joints. Note local lifts, bubbles, wrinkles, exposed board, visible adhesive, glue squeeze-out, and changes to shape or opening feel.
- Compare with one approved reference. Keep the approved sample identified and accessible. A proposed change should be judged against the same agreed reference, not against memories, photos with unknown conditions, or several inconsistent samples.
- Use developmental handling as an observation. If a careful hand check exposes a lift or tear, record where it happened, how it was handled, and the visible failure mode. Describe it as a developmental observation, not as an ASTM result.
- Escalate only the decision-critical question. Where a controlled comparison is necessary, select a qualified lab and give it the actual material construction, intended purpose, reference sample, and desired comparison. Ask whether a representative peel specimen is appropriate.
- Review cosmetics and mechanics together. A bond that remains intact but leaves excessive glue squeeze-out, staining, edge show-through, or an unacceptable turn-in is not necessarily an approvable jewelry box. Equally, a cosmetic defect may require a different correction from a bond failure.
- Hold, retest, or approve with change control. Hold production when the failure affects the approved construction or cannot be explained. Retest changed material or process conditions against the same approved reference. If approval follows a change, update the controlled specification so the next sample and production run are not judged against an obsolete basis.
Humidity exposure and jewelry tarnish are separate questions. A mechanically intact wrap does not establish chemical compatibility with jewelry, and an adhesion review should not be presented as a tarnish assessment. Plan a separate jewelry packaging tarnish assessment when that risk is relevant.
Buyer FAQ: Glue Bond Testing
What is the procedure for a peel adhesion test?
For a controlled comparison, a representative flexible bonded specimen is prepared, conditioned, and separated in an agreed peel geometry using suitable equipment. The report should identify the construction, geometry, width, speed, conditioning, and failure mode. A finished-box hand pull is useful during development but is not equivalent to a standardized peel test.
Which type of test is ASTM D903?
ASTM D903 is a comparative peel or stripping-strength method for adhesive bonds tested on standard-sized specimens under defined conditions. It is most useful when the box’s material pair can be represented by a suitable specimen. ASTM D903
What is the difference between 180-degree and 90-degree peel?
They use different separation geometries. In 180-degree peel, the flexible layer is folded back as it is pulled. In 90-degree peel, the flexible layer separates at a right angle from a secured rigid substrate. Because the loading differs, results should be compared only within a clearly matched method and construction.
Does paper fiber tear mean the glue bond is approved?
No. It records that paper fibers failed during that observation, but substrate strength and sample conditions can influence the outcome. Review the location, material identity, conditioning, and whether the assembled box also meets cosmetic and structural expectations.
Should every joint on the box receive a peel test?
No. A wrap-to-board coupon can answer a controlled comparison question, while a corner or structural joint may need assembled-case examination or a different evaluation. Ask the laboratory to confirm which construction its specimen represents and what remains outside the result.
For a box project that needs a documented approval basis, share the construction and approved reference with ON THE WAY before authorizing production.